Pillsbury Doughboy Cake
First I have to say that this was my VERY first time making a cake! My mom is a professional cake decorator. She has made many wedding cakes. Over the years I've watched her decorate cakes and for her 52nd birthday I decided to give it a try to surprise her. :) So here are my step-by-step instructions on how to make the cake I made .....
I started off by buying a 1974 Wilton Pillsbury Doughboy cake pan mold on-line, which measure 14"X8". I coated the inside of the doughboy cake can with "Crisco Spray, with Pillsbury Flour". It was amazing! The cake never stuck. I bought 1 box of Pillsbury Moist Supreme Devil's Food cake mix and baked it according to the directions on the box. I let the cake cool completely.
~~~~~~~~~~~~~~~~~~~~~~~~~~~~~~~~~
Frosting:
3/4 cup shortening
2 lbs. powered sugar
2 cap fulls of butter flavoring
2 cap fulls of almond flavoring
1/2 cup water
Cut shortening into pieces in mixing bowl. Add powdered sugar and beat (you may want to place a towel around the bowl so powered sugar doesn't go everywhere). Add butter and almond flavoring. While mixing, slowly add water. Mix well on high until creamy. NOTE: Keep the frosting covered with Saran Wrap while frosting the cake so that it won't dry out.
~~~~~~~~~~~~~~~~~~~~~~~~~~~~~~~~~
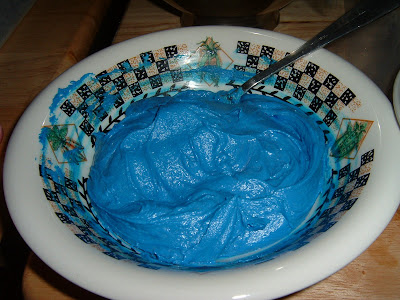
After making the frosting I dipped out two small bowls of frosting. To these bowls I added the Wiltons food coloring. I bought all my cake decorating supplies at Wal-Mart. For the brown outline I bought Wiltons Brown Icing Color. For the doughboy blue color I bought Wiltons Royal Blue Icing Color. For the decorating part I bought a box of Wiltons 12 inch Disposable Decorating Bags. My cake icing tips were: for outlining in brown, a #5 Round tip / for starring in white and blue, a #21 Open Star tip. I also bought some couplers (to hold the tip unto the bags).
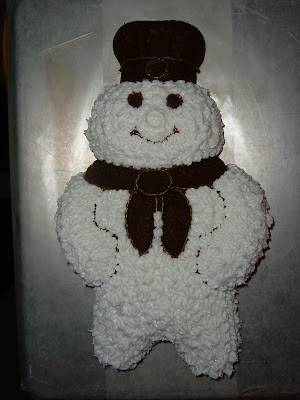
After filling the bags I outlined doughboy's features in the brown frosting with the #5 Round tip first. After that I star tipped all of the white areas with the #21 Open Star tip. For his hat band I used the same #21 Open Star tip, but I just did stripes instead of stars. After I was done with the white color, I washed the #21 Open Star tip and stuck it on the blue bag. Then I filled in all the blue areas of the doughboy. For the knot on his neck tie, I just did a round swirl, making it look like a knot (I did the same thing for his nose, except in white). For his eyes and button on his hat I squeezed out a LARGE star from the same #21 Open Star tip. And ~VOILA~ you have a cute Pillsbury Doughboy cake! ;)
TIP: If you plan on decorating the cake the day before, I wouldn't add the blue frosting until hours before the party because it will bleed blue coloring onto the white frosting.
Here are some step-by-step pictures of how I decorated my Doughboy cake. Hope this helps someone!


